Artisan crafted
Eco-conscious
Low-maintenance
Timeless
Free shipping over AED400
Artisan crafted
Eco-conscious
Low-maintenance
Timeless
Free shipping over AED400

Follow our step-by-step guide to style your florals like a florist.

Your faux florals will arrive carefully wrapped in a sustainable cardboard box, with stems flat-packed for ease and protection.

At I V Y + S I L K, we know that every home holds its own collection of vessels and vases - so we leave our stems untrimmed, allowing you the freedom to shape them as you wish, across a range of sizes and styles.

No floral background is needed - each arrangement is thoughtfully curated with texture and flow in mind, so even when placed directly into a vase, they’ll feel full of life and beauty.

We know you’ll find joy in becoming the creator - gently shaping, placing, and discovering your own unique floral style along the way.

For gentle guidance on how to style them the I V Y + S I L K way, see our simple steps below.

Step 1

S T Y L E

Front Facing Design

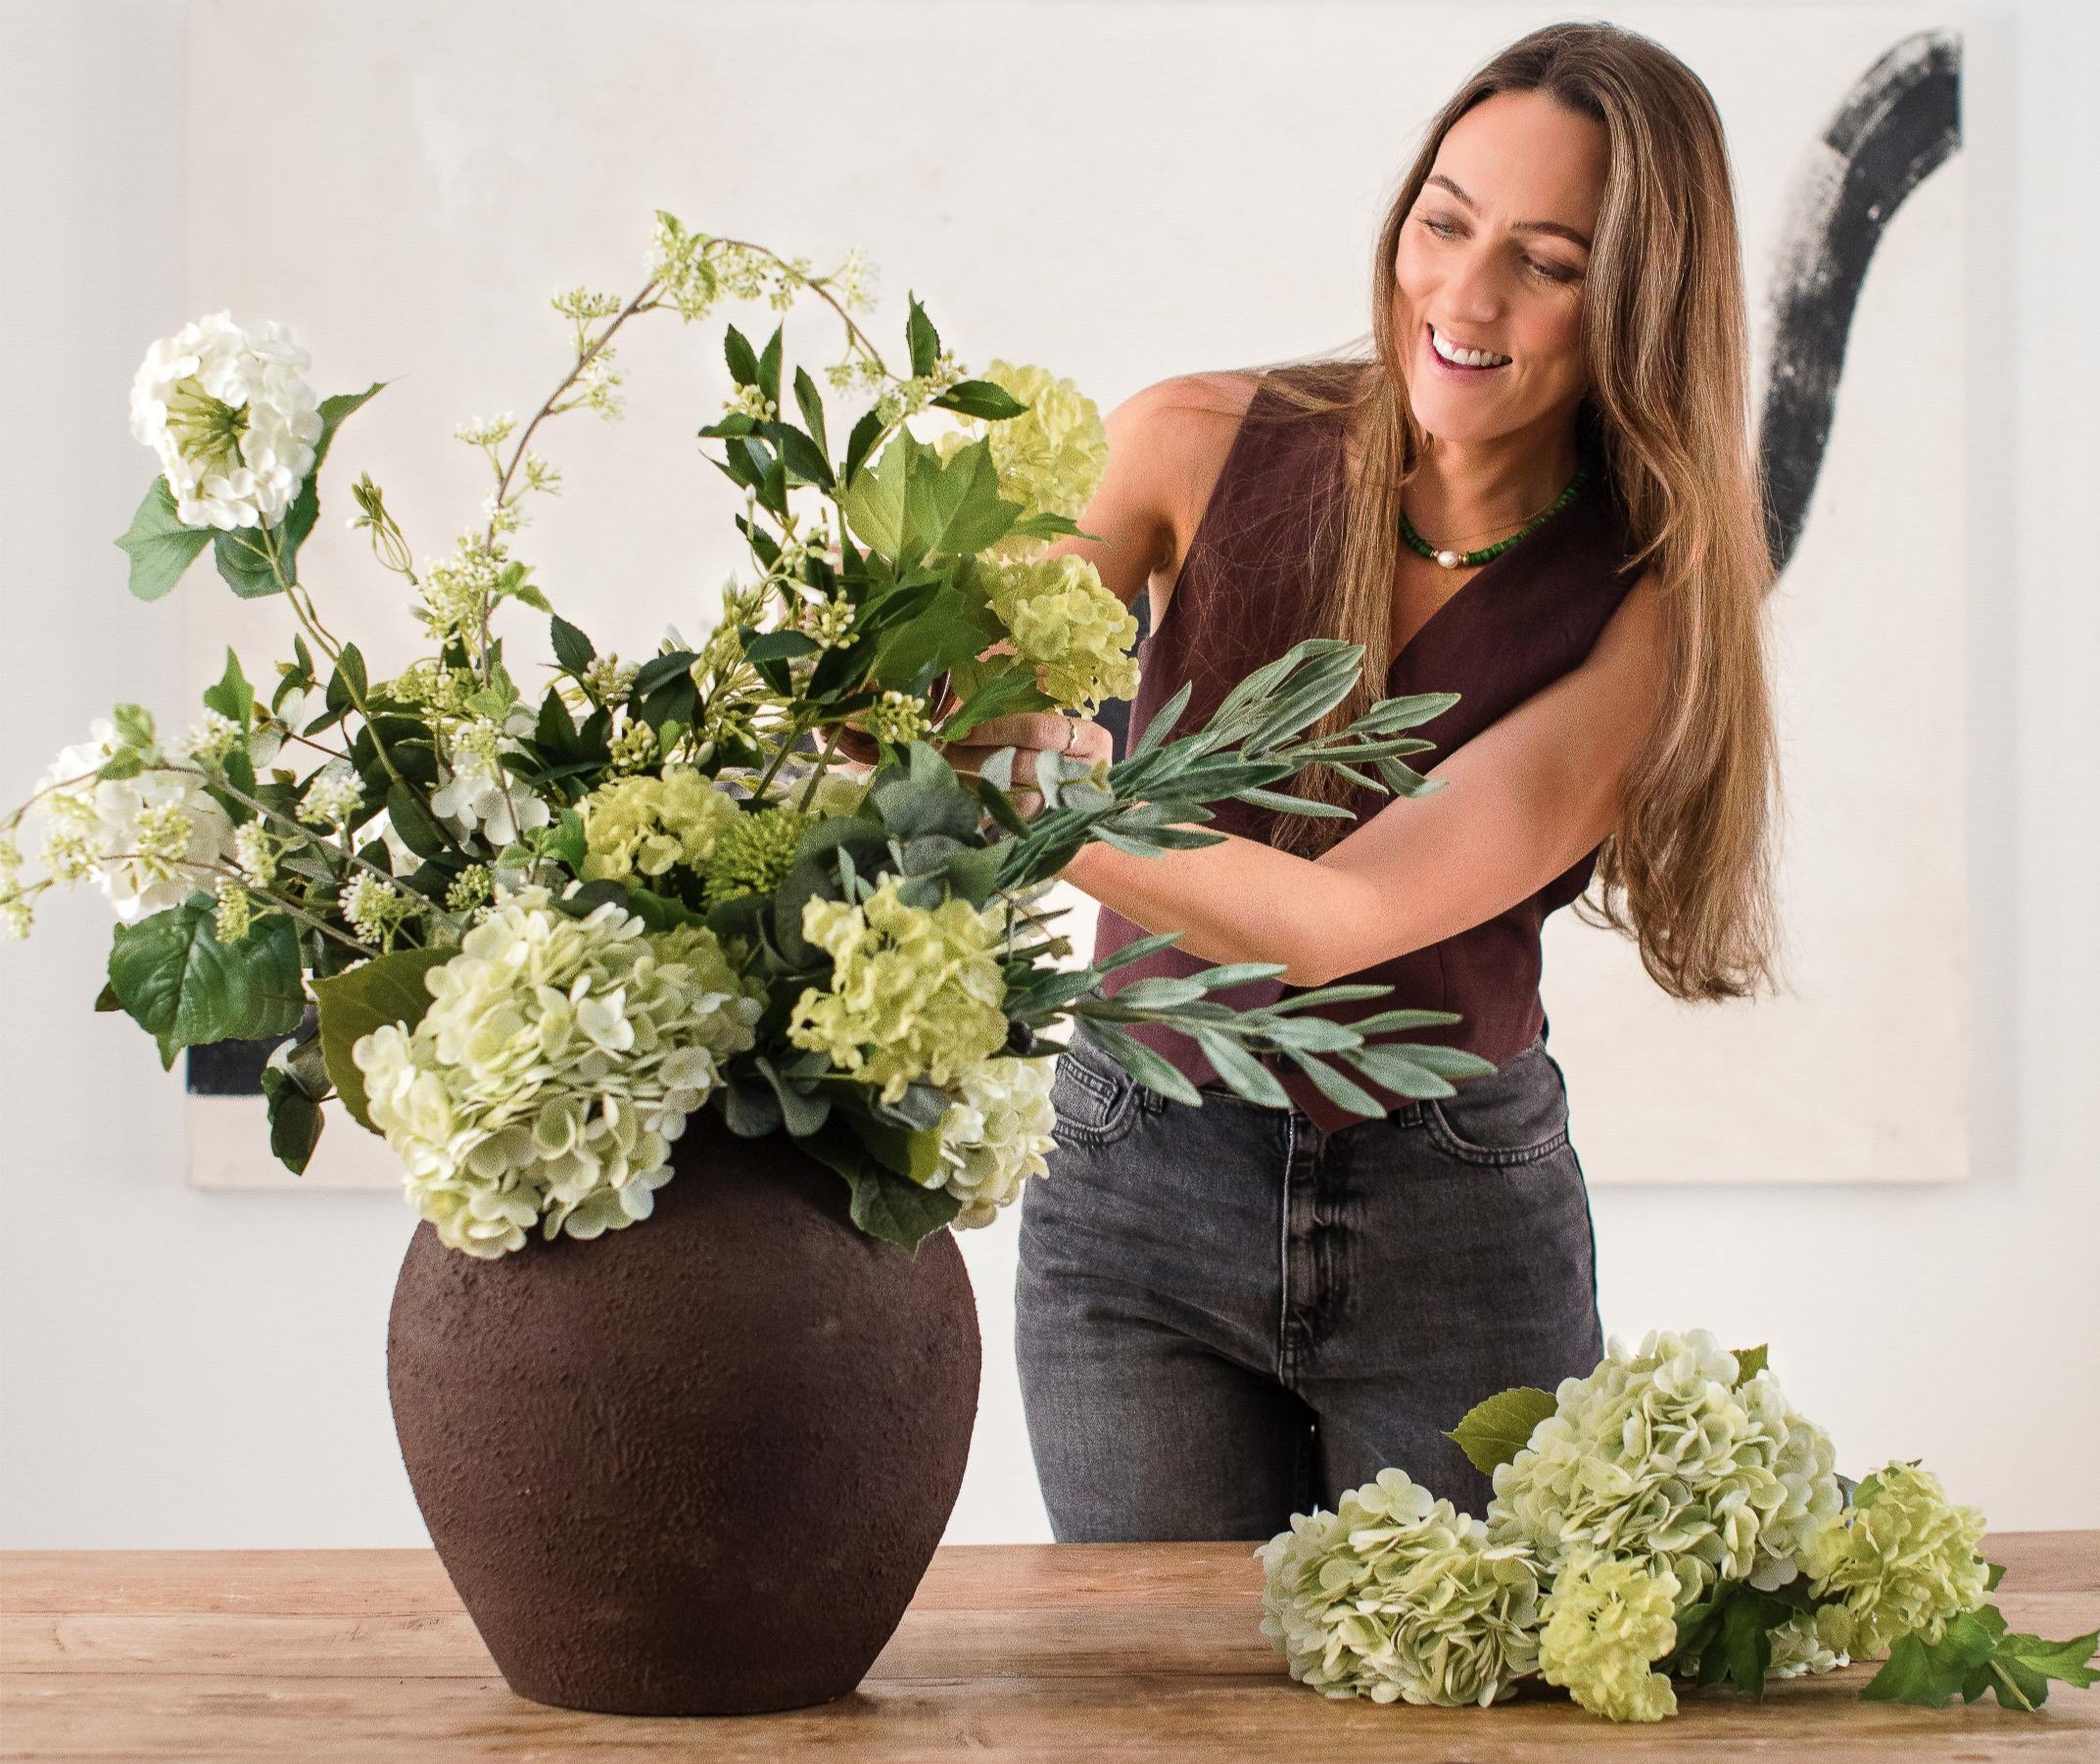
Front-facing designs are created with the statement focal flowers positioned toward the front, allowing them to take the spotlight.
This design offers more room to play with form and movement.

Perfect for shelves, consoles, sideboards, dining tables + entry tables - anywhere the front of the arrangement is to create the most impact.

Most of our designs follow this style, as it’s often the most loved for its shape, flow + visual impact.

360° Design

A 360 design are designed to be admired from every angle - with no defined front or back. Full, balanced, + abundant, they’re best suited to kitchen islands, coffee tables, or certain dining tables where all sides are very clearly on show.

The shape is typically more compact in width, yet rich in depth and texture.

Choose Your Pot

The vase you choose plays a key role in shaping the final look of your arrangement. A taller vase will add height - perfect for console or entryway styling - while a lower vase suits relaxed settings like coffee tables. The most important detail, though, is the neck size. A narrower neck (like our Ember vessel) holds the stems tightly for a more composed look, while a wider neck (like our Earth vessel) allows for a looser, more natural feel. All of our arrangements work beautifully across our vessel range, but we do have our favourites—check out the styling tips under each product for our expert pairings.

Florist's Secret

Visualise the placement before you begin. It makes all the difference.

STEP 2

F O L I A G E

Build the foundation - this is your base + structure.

You are the creator! You decide how wild or how compact you wish for your arrangement to be. This all starts with the foliage placement.

Let your greenery stretch wide and tall to create a natural silhouette - don’t worry about symmetry. Work with the natural curves of the stems, just as they’d grow in nature. It is important to vary the height + angle of stems to add shape + fullness, and don’t be afraid to let a few trails or branches gently spill over the edge. Seek beauty not symmetry. Let your arrangement feel natural, not perfect.

Adjust the stem heights by gently bending them to suit your desired look. If needed, you can trim the stems using wire cutters. A handy tip: bend the end of the stem - this helps secure it more firmly in your vase and keeps the arrangement in place.

For front-facing designs, extend your foliage to the sides to create width and a soft ‘S’ style shape when viewed from the front. If you’re creating a more compact or 360° design (like our Classic size or for a smaller space), keep your stems closer to the centre and fold them lower into the vase to build bulk and balance.

Be sure to bend each stem in the direction that feels most natural. I’m always shaping and curving them by hand to create the desired shape, movement and flow.

I + S Styling Tip:

+ Use some eucalyptus stems folded low into the pot to add depth and fullness - these are perfect for grounding the design

+ Use longer foliage stems to reach outward to the sides to shape the design.

+ I like to save a few longer, slender stems - like Ruscus - for the final stages. There’s no right or wrong way, but I recommend using most of your foliage early on, keeping about 10% aside to fill any gaps or add final shape once your arrangement begins to take form.

Florist's Secret

Foliage defines the shape, scale, + overall flow of your design.

STEP 3

F O C A L

Focal Flowers: Bring drama to your arrangement by adding your statement stems.

Your focal flowers are the stars of your arrangement - the statement stems that bring it to life. Often hyper-realistic and real-touch, they add bursts of colour, texture, and depth.

Place them at varying heights to create dimension. For example, keep one rose stem longer + another slightly shorter - this contrast adds visual interest and a more natural flow.

Whether you mix colours (for example green hydrangeas + white hydrangeas) throughout or cluster them together is entirely personal - there’s no right or wrong. I often blend both techniques across different designs. Clustering the same colours together creates a more modern, editorial feel, while mixing colours throughout brings a softer, more traditional look.

For front-facing designs, position your statement flowers more towards the front/middle and let them span to the sides. Turn their faces/heads forward + allow them to softly lead the eye.

For 360° designs, distribute them evenly around the arrangement so each angle feels intentional and full.

I + S Styling Tip:

+ Gently ruffle your rose petals to help them open and appear more lifelike.

+ Angle the flower head slightly forward - especially in front-facing designs

+ For smaller hydrangea heads or viburnum stems, bend them to curve softly up or down to mimic natural movement.

+ Use larger hydrangeas at different heights - some low near the vase opening, others a little taller. They help create fullness and shape. In narrower vases, keep them taller; in wider or shorter vessels, place them low and full - in this case, gently bending or trimming the stem if needed (see our floral care page for trimming tips).

Florist's Secret

Cluster colours for a more modern feel, + spread colours evenly throughout for a more traditional style arrangement

STEP 4

T O U C H E S

Layer in your final soft, delicate + slender stems to complete.

Once your foliage + focal flowers are placed, it’s time to add your accents - the delicate stems that bring everything to life. Think berries, trailing Amaranthus, hanging ferns, seeded stems, or long, slender foliage (like the 10% you set aside earlier).

These finishing touches fill subtle gaps, add softness, and create that final layer of movement and texture. Though light in form, they’re essential - they complete the story and give your arrangement its natural, lived-in feel.

I + S Styling Tips:

+ I like to save Ruscus foliage stems for the final step. Its long, slender shape brings gentle movement. I often place it off-centre + bend the stem slightly to create a natural flow. It’s a staple in many of our designs.

+ Seeded stems are another favourite. If bulky like a cluster of berries, I tuck them near the front, slightly off-centre to anchor the eye. If more slender, I let them rise softly off centre to add height + again, always shaping them with a natural lean.

+ Use any leftover eucalyptus to fill in gaps and give a final sense of fullness.

+ And finally, I adore trailing stems. I like to gently tuck them into the top edge of the pot, letting them cascade downward - adding movement + an effortlessly authentic finish.

If you’re happy with your arrangement - beautiful. But one of the quiet joys of faux florals is their versatility. You can revisit, reshape, + reimagine your design as often as you like - creating new moods and styles across different vessels and seasons.

Truthfully, I often arrange once… twice… even three times before it feels just right. Other days, it all comes together on the first try. There’s no perfect way - only what feels good to you.

Take your time + when you're ready for more inspiration, our tutorials are always here to gently guide you.